Digital Passport Photo Submission Guide (2026): Upload Rules by Country
Quick Summary — What You’ll Learn
- How digital passport photo uploads work: what portals check (size, face position, background, and signs of editing).
- Country-by-country differences: the US prefers 2×2 inch framing; the UK has strict digital file rules and tells you not to crop.
- A step-by-step workflow: take the photo, validate it, export the right file, then upload it without compression errors.
- How to avoid rejections: shadows, filters/beauty mode, background replacement, and over-cropping are the fastest ways to fail.
You fill out an online passport renewal, click “Upload photo,” select a file from your phone… and the portal instantly rejects it. Not because you look different — but because the background isn’t uniform, the image was compressed, your head is too close to the top, or the system detects you used a filter.
Digital passport photo submission is now the default for many countries and visa portals. That’s good news — it’s faster, cheaper, and you can retry without paying for prints. But it also means your photo is evaluated by automated checks before a human ever sees it. A small issue that might have slipped through in a printed photo (like mild blur or uneven lighting) can trigger an instant upload failure.
In this 2026 guide, you’ll learn exactly how digital passport photo uploads work, how requirements differ across top markets (United States, India, United Kingdom, Canada, Philippines, Nigeria, Pakistan, and more), and how to generate a compliant file you can confidently upload the first time.
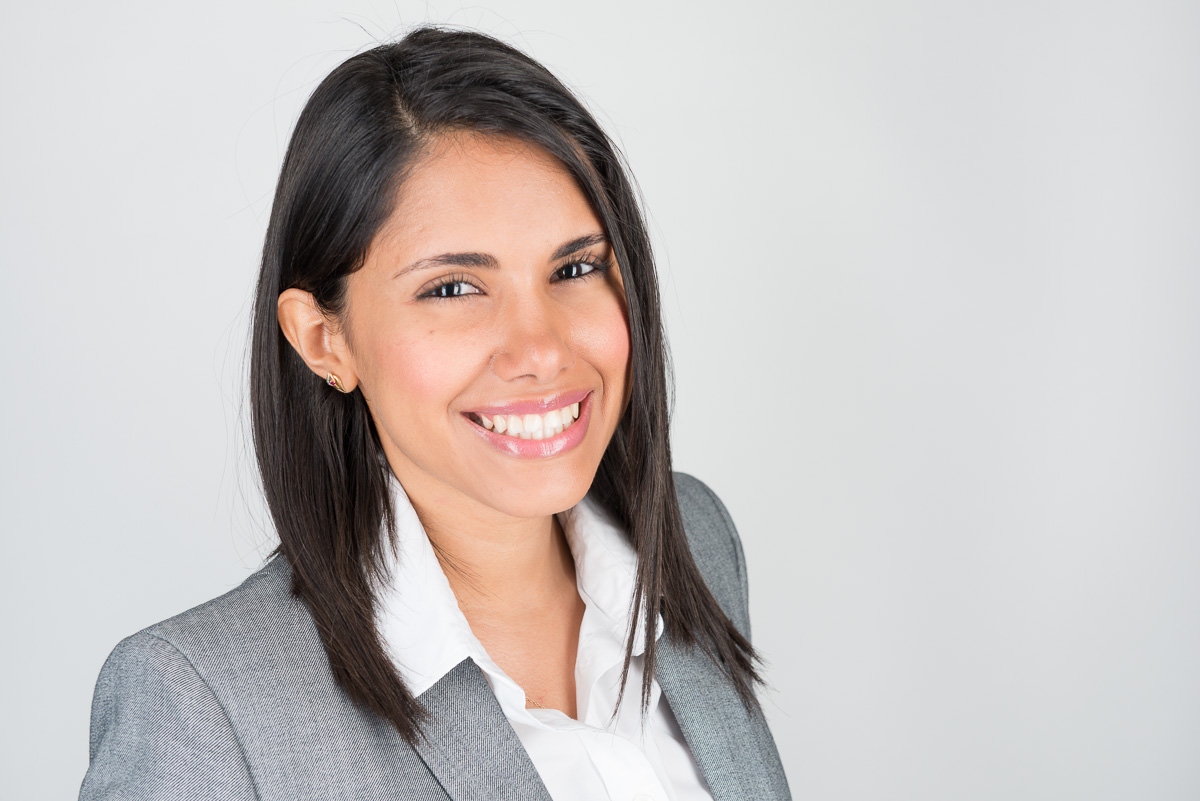
Digital submissions fail most often due to lighting, background, and editing — not the official size alone.
Core Rules for Digital Passport Photo Uploads (What Portals Check)
Digital passport photo uploads are judged in two layers: (1) the human rules (you must look like you, with a neutral expression, correct background, and no obstructions) and (2) the file and framing rules (pixel dimensions, file size, compression, and cropping). The second layer is what makes online submission feel unpredictable — because the same photo can look “fine” to your eye but still fail a portal’s automatic validation.
1) Background + shadows are the #1 reason uploads fail
Most countries require a plain, light background. The United States explicitly requires a plain white or off-white background, free of shadows, texture, objects, or lines. The UK also requires a plain light-colored background and emphasizes no shadows on your face or behind you.
Quick fix: Stand about 2–3 feet away from the wall and face a window. This reduces hard shadows and prevents the “halo” shadow behind your head that upload tools often flag.
2) Cropping rules differ — sometimes the portal crops for you
Here’s a common trap: applicants crop tightly to “passport framing” in their phone editor, then the portal rejects it because it can’t detect shoulders or because the face fills too much of the frame.
The UK guidance for photos taken on your own device says: include your head, shoulders, and upper body, and do not crop the photo; the system will crop it for you. In contrast, some visa sites (and some country portals) want a pre-cropped image with exact aspect ratio. The right approach is to follow the portal you are using — but if you’re unsure, upload a slightly wider shot that clearly includes shoulders.
3) Editing and “beauty mode” are increasingly detectable
Digital tools make it tempting to smooth skin, whiten teeth, remove flyaways, or replace the background. Don’t. The U.S. Department of State says you must submit the original, unchanged photo and warns not to change your photo using phone apps, filters, or artificial intelligence. Automated systems can also detect unnatural edges from background removal.
Rule of thumb: If you used any slider labeled “beauty,” “skin smoothing,” “portrait mode retouch,” “AI enhance,” or “background,” retake the photo and submit a clean file.
4) Glasses rules are stricter for digital uploads
Glare is easier to spot in a digital upload than in a print. The U.S. guidance says to remove eyeglasses (with a medical exception requiring a signed doctor’s note). The UK says not to wear glasses unless you have to, and if you do, your eyes must not be covered by frames and there must be no glare or shadow.
5) Focus, resolution, and compression matter more than you think
Many portals reject files that are technically the “right size” but show compression artifacts or low detail. The UK publishes clear digital file requirements: the image must be in color, clear and in focus, unaltered by computer software, at least 600×750 pixels, and between 50KB and 10MB.
Even when a country doesn’t publish explicit pixel limits, treat those as a good baseline. If your image is smaller than 600×750, it’s often safer to retake the photo rather than upscale it (which can look edited).
Digital Passport Photo Upload Requirements by Country (Comparison Table)
Use this comparison table to understand how digital submission rules differ across major markets. Always verify the exact portal requirements for your application type (passport renewal vs visa vs immigration), but these are the most common official standards travelers run into.
| Country / Region | Common Photo Size | Background | Digital File Rules (high-level) | Notes |
|---|---|---|---|---|
| United States | 2×2 in (51×51 mm) | White / off-white | Upload for online renewal; no filters/AI edits | Head size and position are tightly checked; remove glasses |
| United Kingdom | 35×45 mm (print); digital upload accepted | Plain light background | ≥600×750 px; 50KB–10MB; unaltered; don’t crop | Online checker is strict; light grey/cream works well |
| Canada | 50×70 mm | Plain white or light | Varies by program; strict framing + head size | Canada is one of the strictest on prints; match rules exactly |
| India | Commonly 35×45 mm (varies by pathway) | White or light background | File requirements vary by portal (Passport Seva / OCI / visa) | Always check which application path you’re using |
| Philippines | Often 2×2 in for many applications | Light background | Many overseas applications accept digital uploads | Match the specific consulate/portal rules |
| Nigeria | Varies by passport/visa portal | Light background | Digital uploads commonly used for visa applications | Avoid compression; keep face centered |
| Pakistan | Varies by passport/visa portal | Light background | Digital uploads common for overseas applications | Ensure no shadows; no head tilt |
| Australia | 35×45 mm | Plain light background | Digital-first in many workflows | High-resolution file helps reduce delays |
| Germany / Schengen | 35×45 mm | Light / neutral background | Biometric (ICAO-style) standards; quality matters | Some consulates accept digital; many still want prints |
| Mexico | 35×45 mm | Light background | Often print-heavy (e.g., multiple prints) depending on use | Check if your use case is passport vs visa vs ID |
Why this table matters: Even when two countries share the same printed size (like UK and Germany at 35×45 mm), the upload workflows differ. One portal may crop automatically; another may expect a pre-cropped photo with exact aspect ratio and file size limits.

For digital submissions, a simple phone photo in good light is often better than a heavily edited studio portrait.
Step-by-Step: How to Take and Upload a Digital Passport Photo That Passes
If you follow this workflow, you’ll avoid 90% of upload issues. The goal is to create a clean, compliant original, then generate the correct export for your specific country without introducing edits that trigger rejections.
- Confirm your target document and country. “Passport photo rules” can differ between a passport renewal, a visa application, and a residency permit. If you’re applying abroad (Philippines, Nigeria, Pakistan diaspora applicants), always check the consulate instructions too.
- Choose the right background. Use a plain wall. For US, aim for white or off-white. For UK, a plain light background (often light grey) that contrasts with your hair and clothing works well.
- Set up lighting. Face a window for soft light. Avoid ceiling lights that create under-eye shadows. If you use two lamps, place them at 45° angles on both sides.
- Position the camera correctly. Place the camera at eye level, not below your chin. Use the rear camera if possible for higher quality. Turn off portrait mode if it adds artificial blur or smoothing.
- Pose with a neutral expression. Look straight at the lens, mouth closed, eyes open and visible, and keep your head level. Don’t tilt your head or raise your chin.
- Take multiple shots. Slight variations in posture can affect how the portal measures head size and face position. Take 10–15 shots so you can choose the sharpest, most evenly lit one.
- Pick the sharpest file (no blur, no noise). Zoom in to check eyelashes and hair detail. If the image looks “painted,” it’s either too compressed or has been processed by a beauty filter.
- Do not edit in your phone’s photo app. Avoid brightness/contrast adjustments, background cleanup, or skin smoothing. If you must rotate slightly to level the horizon, do it in a passport tool that does not change your face.
- Crop/export to your country’s exact size. Use a tool that can generate both digital upload files and print layouts. Never stretch or compress the image to force it into a size.
- Upload using a stable connection. Portal errors can corrupt uploads. Use Wi‑Fi and a modern browser. If the portal has a live crop tool (common in the UK), upload the original uncropped shot.
- After upload, review the preview carefully. Some portals auto-crop. Confirm your face is centered, the top of your head isn’t cut off, and the crop didn’t remove shoulders.
Best practice: Keep two versions of your photo: (1) the original camera file (as proof it wasn’t edited) and (2) the exported upload file that matches the portal requirements.
Common Digital Passport Photo Upload Mistakes (and How to Fix Them)
Digital submissions fail fast — which is frustrating, but also helpful. If you know the most common failure modes, you can fix them in minutes.
Mistake #1: The background looks “white” to you, but not to the portal
Phone cameras often capture subtle wall texture or color gradients. Automated checks interpret that as a non-uniform background. Fix it by moving to a different wall, increasing distance from the background, and using softer light.
Mistake #2: Shadow behind the head
A shadow behind your head usually means the light is too directional or you’re standing too close to the wall. Step forward and face the light source.
Mistake #3: Beauty mode, smoothing, or “AI enhance”
Many phones enable beauty settings by default in selfie mode. These can soften skin texture and change edge detail. If you’re uploading to the US online renewal program, the State Department warns against filters and AI changes. Fix: retake with beauty mode off and use the original file.
Mistake #4: Over-cropping (face too large)
Some applicants crop so tight that the portal thinks the face is too big or can’t detect shoulders. Fix: use a wider original. Let the portal crop if it offers a crop tool (UK explicitly says it will crop for you).
Mistake #5: Wrong file type or over-compressed file
If you used a messaging app to send the photo to yourself, it may have been compressed. Always upload the original file from your camera roll or a direct export from a passport tool.
Top-Market Callouts: US, India, UK, Canada, Philippines, Nigeria, Pakistan
Below are practical callouts for the highest-volume audiences ProShoot serves. Treat these as “quick filters” before you upload.
United States (2×2 inch, travel.state.gov)
The US is the largest market and one of the clearest about digital manipulation. The State Department requires a 2×2 inch photo (51×51 mm), centered head and shoulders, plain white or off-white background, and warns to submit the original unchanged photo without software, filters, or artificial intelligence edits. If you’re renewing online, you’ll upload a digital photo file.
India (multiple specs depending on pathway)
India is a massive market — and the confusing part is that “India passport photo requirements” can differ by pathway: Passport Seva, e‑Visa uploads, and OCI/OVS flows can use different dimensions and file limits. Before you take the photo, confirm the exact portal you’re applying through. Then generate the correct export.
United Kingdom (35×45mm print, digital rules are strict)
The UK’s online system is strict and surprisingly specific. The GOV.UK guidance says digital photos must be in color, clear and in focus, unaltered by computer software, at least 600×750 pixels, and between 50KB and 10MB. It also says that if you take the photo on your own device you should include head, shoulders, and upper body and not crop the photo.
Canada (50×70mm, strict acceptance)
Canada’s common format is 50×70 mm and is known for strict acceptance — especially for printed photos. For digital workflows, the biggest risk is producing a file that looks “edited” or that doesn’t match head size rules. If your application expects prints, generate a print-ready layout and avoid home printing unless you can guarantee quality.
Philippines (2×2 inch is common; many apply abroad)
Many Filipino applicants apply overseas, and requirements can vary by consulate. A safe approach is to generate both a clean digital upload file and a print layout in case the consulate requests physical photos. Keep your background light, avoid filters, and make sure the face is centered.
Nigeria (diaspora + visa applicants)
Nigerian applicants often need photos for UK/US/Canada visas where digital uploads are common. Those visa portals are strict about glare, shadows, and face framing. Take the photo with glasses off, use soft lighting, and upload the highest-quality file you can.
Pakistan (diaspora + overseas applications)
For Pakistani applicants applying for visas abroad, digital submission errors are usually technical rather than biometric. The most reliable strategy is a clean, unedited original plus an export that matches the portal’s required aspect ratio. Avoid messaging apps that downscale your image.
Tool: Create a Compliant Digital Passport Photo (and Upload With Confidence)
If you’re worried your upload will be rejected, use ProShoot’s Passport Photo Generator to produce a compliant file for your target country. The tool helps you crop to the correct dimensions, keep your head size in range, and export a clean image that’s ready for digital portals. It’s also useful when you need a print layout (multiple copies on one sheet) for countries or consulates that still require physical photos.
How to use it: upload your original photo, select your country and document type, then download the exported file. If the portal you’re using includes an auto-crop step (common in the UK), download the “digital upload” file but keep the framing slightly wider.
Tips From Professional Photographers (Digital-First Workflow)
Professional photographers who shoot ID and passport photos optimize for consistency — not creativity. Here are digital-first tips that reliably pass automated upload checks:
- Light the background separately (or create distance). If you stand too close to the wall, you’ll cast a shadow. Distance is the simplest fix.
- Use even front light. A window or two matching lamps create symmetrical lighting that looks natural and avoids “one-side shadow” rejections.
- Turn off beauty settings. Pros want visible skin texture and sharp edges because it looks authentic and avoids “edited” flags.
- Shoot at higher resolution than required. Downscaling cleanly is safer than trying to upscale later.
- Keep the lens at eye level. Slight upward angles change face geometry and can trigger biometric mismatches.
- Export once. Every re-save adds compression. Export a single final file and upload that.
FAQ: Digital Passport Photo Submissions
Yes — as long as the photo meets official background, lighting, expression, and file-quality rules. Use good light, keep the camera at eye level, take multiple shots, and export using a dedicated passport tool rather than your phone’s editor.
No. The safest rule is to submit an unaltered original. The U.S. Department of State explicitly warns not to change your photo using phone apps, filters, or artificial intelligence, and many portals now run automated checks for manipulation.
GOV.UK says digital passport photos must be at least 600 pixels wide by 750 pixels tall, in color, clear and in focus, between 50KB and 10MB, and unaltered by computer software.
Follow your portal. The UK explicitly says not to crop photos taken on your own device because the online system will crop it for you. Other portals require a pre-cropped image. When unsure, upload a wider photo with head and shoulders visible.
Use a plain, light background with no texture or shadows. The US requires plain white or off-white. The UK requires a plain light-colored background and clear contrast with your face and hair.
Usually you should avoid glasses because glare and frame shadows trigger rejections. The US tells applicants to remove eyeglasses (unless medically required with a doctor’s note). The UK says do not wear glasses unless you have to, and there must be no glare or shadows.
Automated checks look for background uniformity, head size/position, blur, compression artifacts, red eye, and signs of editing. Even small shadows or a textured wall can cause a failure.
Take a clean original in good light, then use a passport photo generator to crop/export to your country’s exact dimensions. Avoid messaging apps or re-saving files multiple times, because that can add compression.
Often, yes. For example, the UK allows flexibility: children under 6 do not have to be looking directly at the camera or have a plain expression, and children under 1 do not have to have their eyes open. But the child must be alone in the photo with nothing obscuring the face.
Need a Passport Photo That Gets Accepted?
Post a job to hire a local photographer — or browse pros who specialize in ID and passport photos.